have you ever thought about "Action Markers" ? What are these and how to build them ? You all know about smoke markers etc... quite easy stuff, but if you take e.g. an artillery shell that makes a crater and debris is flying around the stuff gets more interesting. Never ever saw something like that on a tutorial so lets have it a go...
Things used:
- My beermatt
- Filler/Spackel
- Garden wire
- small stones from the garden and wood parts
- cotton wool
- colours of course
Step 1: Take your base and fill it with filler/spackel a little bit up. In my part I took a slightly higher middle part.
Step 2: take any round object suitable for your crater and gently push it a bit from the side into the not dry filler/spackel. Why not from top ? Because a shell comes by flying and not simply drops down from out of space
Step 3: Cut your wire into different parts and lengths
Step 4: make sure you know there the shell is coming from and place your wire into the not dried filler/spackel in the opposite direction. Debris is not flying backwards but through the sheer power of impact always front and partly to the side.
Step 5: wait till filler/spackel is dried
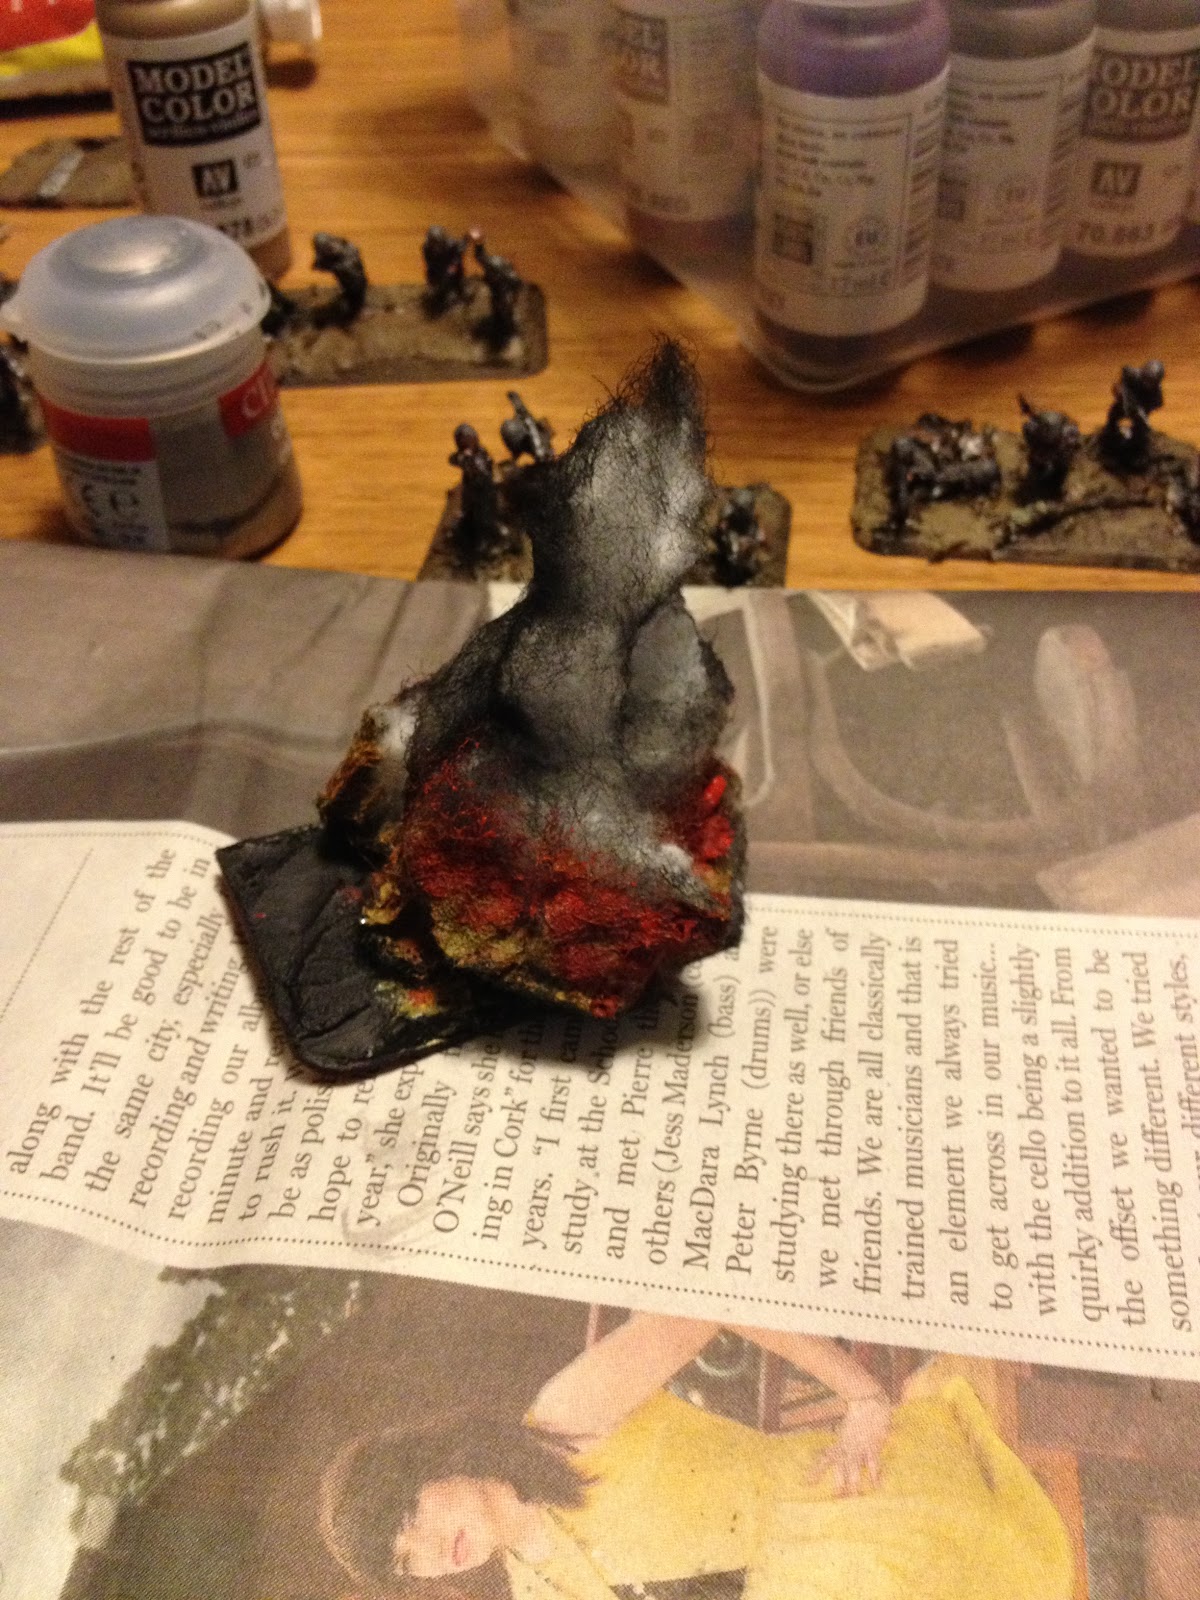
Step 6: take your cotton wool and gently place it around and over the wire so that only small parts look out of it. The rest glue to parts of the crater but so you can still see parts of the impact line. Smoke (in this case the cotton wool will a bit go out to the front and of course up to the air... bare this in mind and take small bits upwards
Step 7: use black spraypaint for undercoating. Bare in mind NOT to spray everything in total black (only the lower parts) as smoke is more heavy and thick on the bottom but gets lighter and more greyish up to white on top.
Step 8: take orange, yellow and red colours to lightly paint the lower parts of the impact scene on the bottom (thats the explosion of the shell fired)
Step 9: Take your outside debris (small stones, wood parts, etc..) and glue them to the wire ends.
Happy building !


Keine Kommentare:
Kommentar veröffentlichen