Also there are a lot of questionmarks while taking a look through all the old and hidden belongings he left behind. Questions I at least like to research to get an answer to it.
First of all there are all his war medals. As my granddad joined the army back in 1942 there are still a lot of things he earned. Then there is this book I found on the attic and a couple of letters from his old comrades.
Book:

Glad being he was not a Waffen SS guy, but being part of the 21st Infantry Division (21. ID).
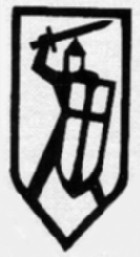
A short research filtered out:
1 Use and subordination :
The staff was as commander of Elbing on 1 October 1934 in Elbing , in the military district I formed . The name was a cover name for the expansion of the Reichswehr. On 15 October 1935 was the bar in the unmasking of the 21st Infantry Division renamed. On 21 The Division August 1939 was mobilized . Here, the division was the MG Battalion 9 and the second Company of MG Battalion 31 assumed. Re.installed the Reconnaissance Battalion 21 from the Cavalry Regiment 4 and the field replacement battalion 21 On 1 September 1939 , the division crossed the Polish border and stormed the fortress Graudenz . Subsequently, the Division was moved to Johannesburg and met before from there via Kolno and the Narew up to Novgorod as well as Bialystock until after Wolkowyssk . In November 1939, the division was transferred to the Eifel in the room Bitburg . In January 1940, the Field Replacement Battalion 21 was sent to the 291 Submitted Infantry Division. From the 10th May 1940 took the Division at the Battle of France in part , passed through Luxembourg and Belgium and came over Mezières and Charleville to the Aisne front . Here , the division had to endure heavy fighting . In the second phase of the campaign , the " Battle of France " , the division marched fighting over Pethes , St. Menehould , Bar -le- Duc to the southeast. Already in September 1940 moved the division in the home. In October 1940, the staff of the Infantry Regiment 3 and the third battalions of the infantry regiments of the 121st were Submitted Infantry Division. As of 22 June 1941 took part in the Russian campaign the division . From the space Tilsit , the division came to Lithuania before , went with Jacob City over the Daugava and came over Ostrow and Porkhov on Dno ago. Here , the division turned to the Illmensee and fought on the north bank of the Volkhov northward . Finally, the Division met before on Wolchowstroj . In December 1941, the Division had to retreat behind the Volkhov until after Kirishi . Here was the division 's only German bridgehead on the east bank of the river. The division remained the whole year 1942 in this sector of the front , where they suffered heavy losses . In 1943, the division in the battles around the Sinyavino Heights south part of Lake Ladoga . The major offensive of the Red Army in January 1944 began the retreat from Leningrad on Pskov to the Baltic for the division. In October 1944 , the division in Riga was loaded onto ships and transported into the home. In the space of Tilsit , the division has been refreshed in the short term and then inserted in the space between Goldap and Gumbinnen . In 1945, the Division took part in the retreat fighting over the Masurian Canal, before Schippenbeil , across the avenue to participate in the space - Bartenstein Heilenberg and German - Eylau . In March 1945, the Division was encircled in the boiler of Heiligenbeil and suffered heavy losses here . The Division was smashed . Remnants of the Division were concentrated on the peninsula Peyse to a battle group on 26 April 1945 , however, was also destroyed.
1939Date Army Corps Army Army Group siteSeptember XXI 3 Army North East Prussia , PolandOctober Reserve - North PolandNovember 12, III Army A Eifel
1940Date Army Corps Army Army Group site1 January 12, III Army A Eifel2 March 12 XVIII Army A Eifel, LuxembourgJune 12, XIII Army A Aisne , Marne3 Administrative Order for July 12 Army C France13 July 12 XXXIII Army C France28 July 12, XXV Army C France28 July 12 XVIII Army C FranceAugust 12, XXVII Army C France12 September I 18 Army B East Prussia
1941Date Army Corps Army Army Group site1 January 18th I Army B East PrussiaFREE I 18 Army C East Prussia22 June 18th I Army North Tilsit , VolkhowSeptember I 16 Army North MurmanskbahnDecember 18th I Army North Volkhov
1942Date Army Corps Army Army Group siteMay 18, XXVIII Army North Ladoga
1943Date Army Corps Army Army Group site1 January 18, XXVIII Army North Ladoga27 January 18 XXVI Army North Ladoga4 April 18, LIV Army North Ladoga15 August 18 XXVI Army North LadogaOctober 18, XXXVIII Army North VolkhowNovember XXVIII 18 Army North Volkhow
1944Date Army Corps Army Army Group siteJanuary 18, XXVIII Army North Pskov , Walk , RigaOctober 3 IX Panzer Army center TilsitNovember 4th Reserve Army center East PrussiaDecember 4 XXXIX Army center East Prussia
1945Date Army Corps Army Army Group siteJanuary 4 XXXXI Army center East PrussiaFebruary XX 4 Army North East Prussia ( Heiligenbeil )April XXVI East Prussia - Prussia ( pillau )
* Note: The insinuations are each period from that date / valid .
2 Division commanders
Lieutenant General Albert Wodrig installation - 10 November 1938
Lieutenant General Kuno -Hans von Both 10 November 1938 - 20th October 1939
Lieutenant General Otto Sponheim 1 November 1939 - April 1942
Lieutenant General William Bohnstedt April 1942 - April 1942
Lieutenant General Otto Sponheim April 1942 - 10 January 1943
Lieutenant-General Gerhard Matzky 10 January 1943 - 1 October 1943
Colonel Hubertus Lammey 1 October 1943 - December 1943
Lieutenant-General Gerhard Matzky December 1943 - 1 March 1944
Major General Franz Sensfuß 1 March 1944 - 28 March 1944
Lieutenant General Hermann Foertsch 28 March 1944 - 22 August 1944
Major General Henry Goetz 22 August 1944 - 25 September 1944
Colonel Hengersdorff 25 September 1944 - October 1944
Colonel Scharenberg October 1944 - 12 December 1944
Colonel Beyse 12 December 1944 - 14 January 1945
Major General Henry Goetz 14 January 1945 - 1 April 1945
Major General Karl Koetz 1 April 1945 - Capitulation
1 General Staff Officer :
Lieutenant Colonel i.g. Eberhard von Kurowski 3 November 1937 - (1939 )
Major iG Werner von Tippelskirch (1939 ) - February 1940
Colonel Bernard of Chevallerie February 1940 - 3 March 1943
Major i.g. Prittwitz and Gaffron 3 March 1943 - April 1943 I.V.
Lieutenant Colonel Friedrich Schroetter April 1943 - September 1944
Major i.g. Collée September 1944 - April 1945
Major i.g. Joachim Cell 1 May 1945 - Capitulation
3 outline :
Commander of Elbing (1 October 1934) :
Infantry Regiment German Eylau ( staff , I. -III. , Yield).
Infantry Regiment Marienburg ( staff , I. -III. , Yield).
Artillery Regiment Elbing ( bar , I-IV )
Engineer Battalion Königsberg B
21 Infantry Division (15 October 1935) :
Infantry Regiment 3 ( staff , I. -III. )
Infantry Regiment 24 ( staff , I. -III. )
Infantry Regiment 45 ( staff , I. -III. )
Artillery Regiment 21 ( staff , I. -III. )
Artillery Regiment 57 ( I, II )
Antitank Department 21
Engineer Battalion 21
Infantry Divisions News Department 21
21 Infantry Division (6 October 1936) :
Infantry Regiment 3 ( staff , I. -III. , I. Res . , II Erg )
Infantry Regiment 24 ( staff , I. -III. )
Infantry Regiment 45 ( staff , I. -III. )
Machine Gun Battalion 9
Artillery Regiment 21 ( staff , I. -III. )
Artillery Regiment 57 ( I, II )
Antitank Department 21
Engineer Battalion 21
Infantry Divisions News Department 21
21 Infantry Division (12 October 1937) :
Infantry Regiment 3 ( staff , I. -III. , I. Res . , II Erg )
Infantry Regiment 24 ( staff , I. -III. )
Infantry Regiment 45 ( staff , I. -III. )
Machine Gun Battalion 9
Artillery Regiment 21 ( staff , I. -III. )
Artillery Regiment 57 ( I, II )
Antitank Department 21
Engineer Battalion 21
Infantry Divisions News Department 21
21 Infantry Division (November 10, 1938) :
Infantry Regiment 3 ( staff , I. -III. , Erg . )
Infantry Regiment 24 ( staff , I. -III. )
Infantry Regiment 45 ( staff , I. -III. )
Machine Gun Battalion 9
Artillery Regiment 21 ( staff , I. -III. )
Artillery Regiment 57 ( I, II )
Antitank Department 21
Engineer Battalion 21
Infantry Divisions News Department 21
21 Infantry Division ( September 1939 ) :
Infantry Regiment 3
Infantry Regiment 24
Infantry Regiment 45
Artillery Regiment 21
I. / Artillery Regiment 57
Observation Division 21
Reconnaissance Battalion 21
Antitank Department 21
Engineer Battalion 21
Infantry Divisions News Department 21
Field Replacement Battalion 21
Infantry division supply officer 1
21 Infantry Division ( August 1940 ) :
Infantry Regiment 3
Infantry Regiment 24
Infantry Regiment 45
Artillery Regiment 21
I. / Artillery Regiment 57
Reconnaissance Battalion 21
Tank Destroyer Division 21
Engineer Battalion 21
Infantry Divisions News Department 21
Infantry division supply officer 1
4 replacement:
For the Ersatzgestellung the rod was the Infantry Replacement Battalion 3, later Grenadier Replacement Battalion 3 , in charge .
Taken from:
http://www.lexikon-der-wehrmacht.de/Gliederungen/Infanteriedivisionen/21ID.htm


