Donnerstag, 11. Oktober 2012

Flames of War - Rangers Programm - First time on the field at UCC / Cork


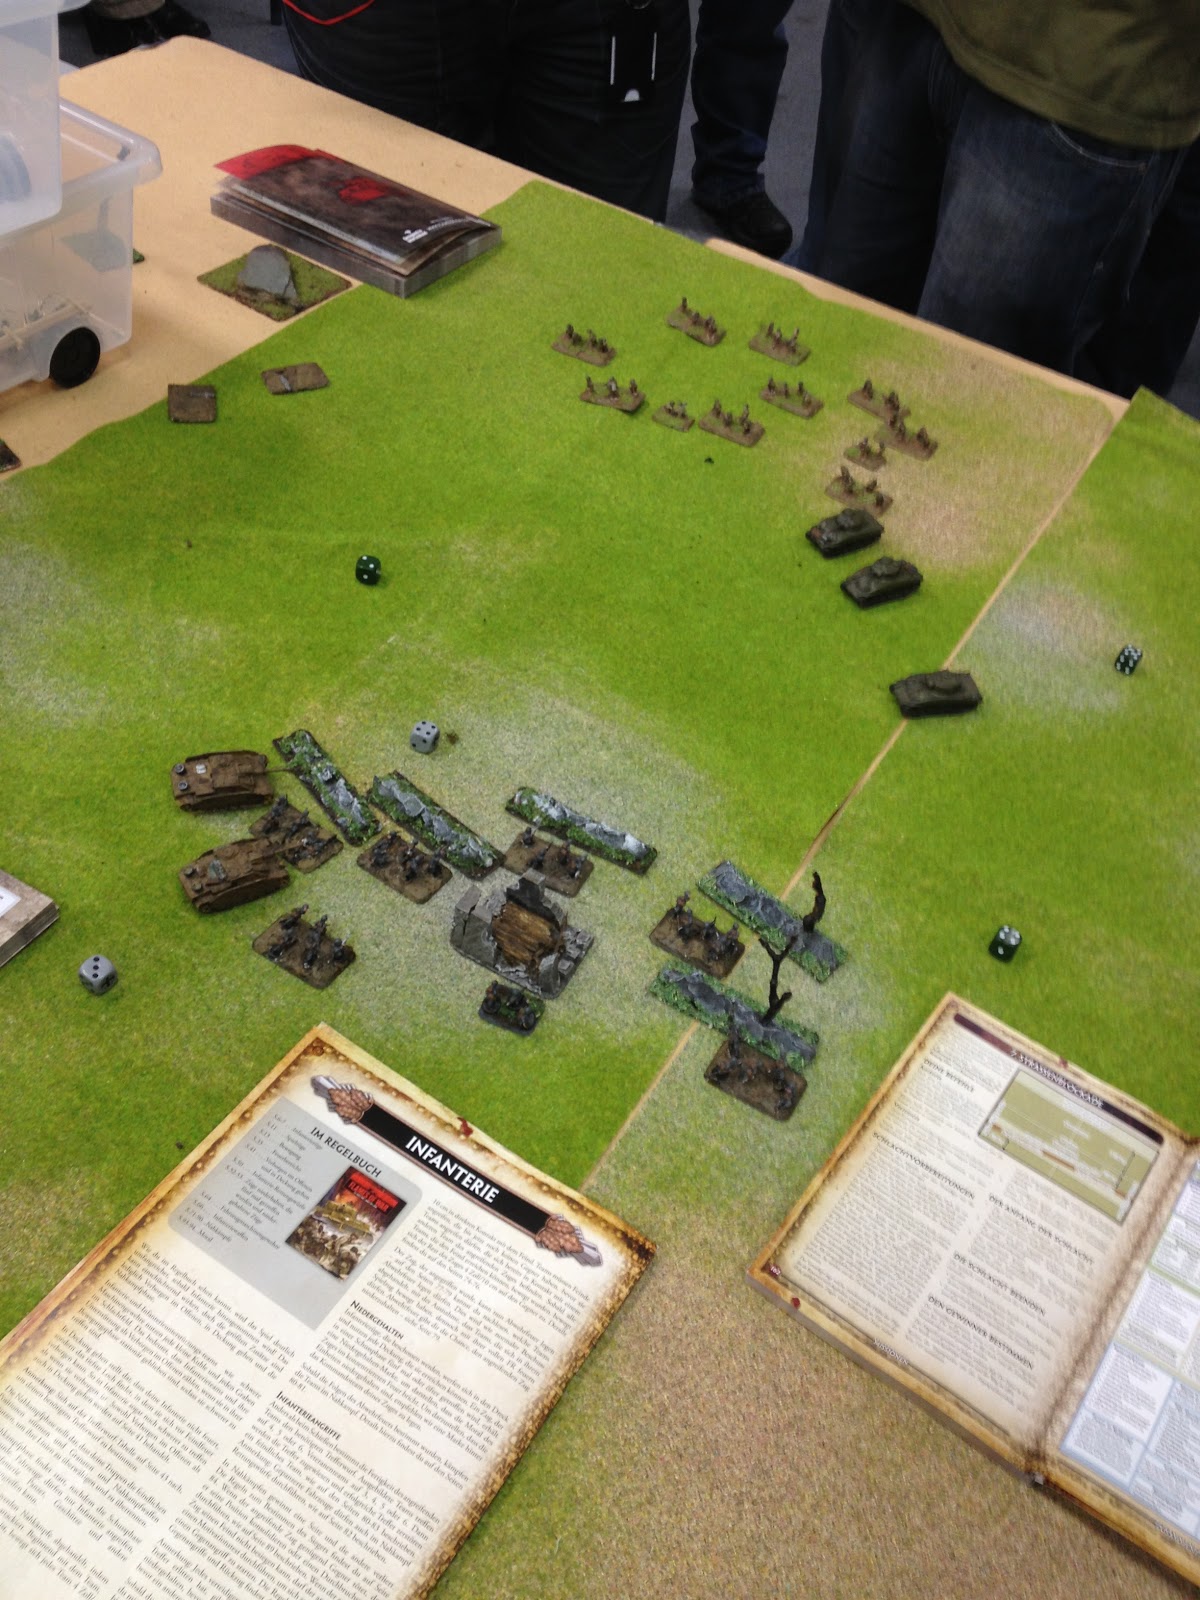
We've just held Round 1 of our Flames of War introductory games round in regards to the Battlefront Rangers program at UCC College Cork, Co.Cork, Ireland.

With no known history of Flames of War events until now, I was very curious to see what kind of attendance I'd see. I knew there had been a couple of requests at our local "Other Realms" shop in Cork, but was very delighted to gain at least four brand new players.

This will have to go on. The seed is planted. Up next will be demo games at the "Other Realms" Store in Cork at a saturday or sunday. Lets see what this brings. Many thanks for all those playtesters and players (started out with being a one on one learning game and ended up 3 versus 3 !). Awesome !

Enclosed some pictures !


Powered By

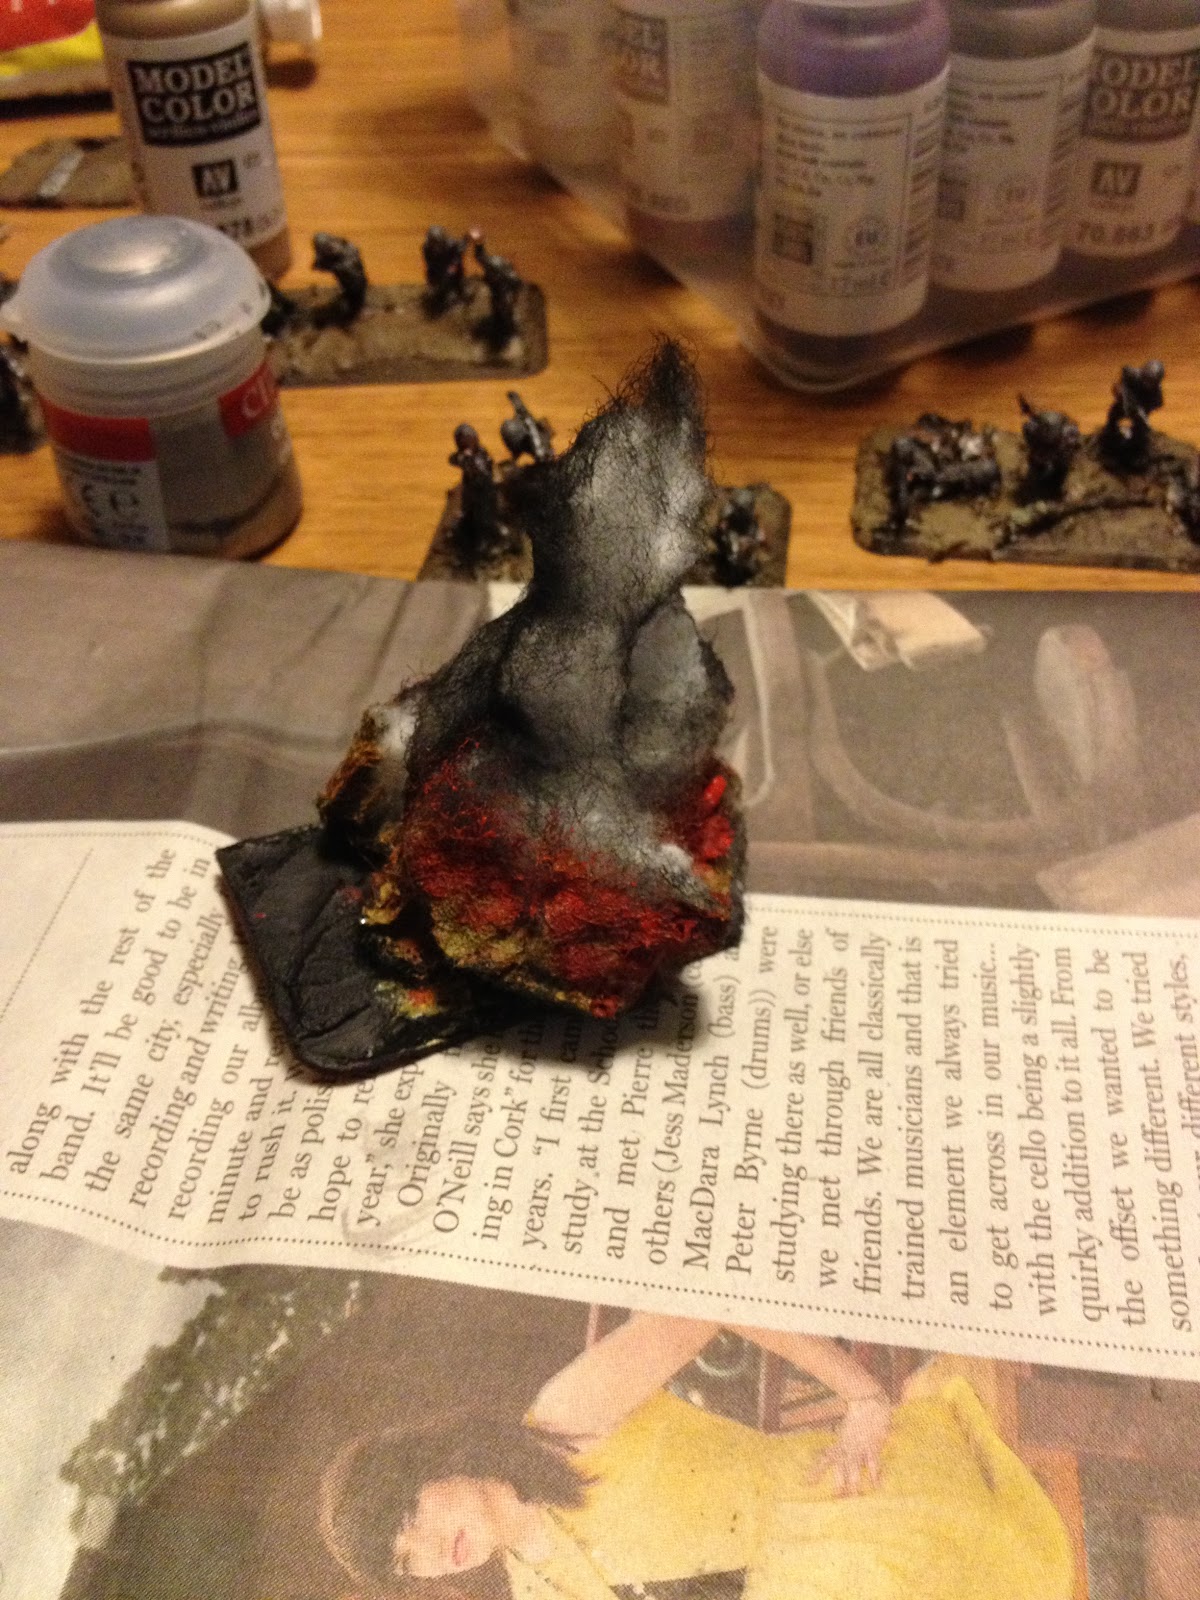
Flames of war - (Tutorial) - Action Markers (Shell explosions)

Hi all,

have you ever thought about "Action Markers" ? What are these and how to build them ? You all know about smoke markers etc... quite easy stuff, but if you take e.g. an artillery shell that makes a crater and debris is flying around the stuff gets more interesting. Never ever saw something like that on a tutorial so lets have it a go...

Things used:

- My beermatt
- Filler/Spackel
- Garden wire
- small stones from the garden and wood parts
- cotton wool
- colours of course


Step 1: Take your base and fill it with filler/spackel a little bit up. In my part I took a slightly higher middle part.

Step 2: take any round object suitable for your crater and gently push it a bit from the side into the not dry filler/spackel. Why not from top ? Because a shell comes by flying and not simply drops down from out of space

Step 3: Cut your wire into different parts and lengths

Step 4: make sure you know there the shell is coming from and place your wire into the not dried filler/spackel in the opposite direction. Debris is not flying backwards but through the sheer power of impact always front and partly to the side.

Step 5: wait till filler/spackel is dried

Step 6: take your cotton wool and gently place it around and over the wire so that only small parts look out of it. The rest glue to parts of the crater but so you can still see parts of the impact line. Smoke (in this case the cotton wool will a bit go out to the front and of course up to the air... bare this in mind and take small bits upwards

Step 7: use black spraypaint for undercoating. Bare in mind NOT to spray everything in total black (only the lower parts) as smoke is more heavy and thick on the bottom but gets lighter and more greyish up to white on top.

Step 8: take orange, yellow and red colours to lightly paint the lower parts of the impact scene on the bottom (thats the explosion of the shell fired)

Step 9: Take your outside debris (small stones, wood parts, etc..) and glue them to the wire ends.

Happy building !


Mittwoch, 10. Oktober 2012

Flames of war - (Tutorial) - Cheapest Objective Markers

Hi all again,

with tomorrows games hopefully upcoming I needed some more preparation. As being sick yesterday with flu and so one day less to spend on more things to come I considered the best and easiest way to come up with high class objective markers.

If you are lucky and own a couple of the fine stuff things by Battlefront you know that behind the blisters are some of the best printed medals of honor of the different nationalities. So easy to convert them to your markers:

Step 1: Use a large base (in my case the preferred beermatt

Step 2: Cut out the back of the original backside of the blister leaving only the medal of honor for the objective

Step 3: Glue the blisterpart to your base

Step 4: for protection reasons either glue with white pva or some similar stuff plasticcard or kitchenfoil on it.

Ready you are.. that sounds like mass production.....

Happy building


Samstag, 6. Oktober 2012

Flames of war - (Tutorial) - Armour bogged down markers

Hei all again,

after announcing this months topic on building and tutorials I just started my first two bogged down markers.

You normally find them in a special token set to be sold by retailers. Tokens look nice but are not available on the real field of battle.

For the two I want to build I need the following:

- Beer matt cut to medium sized base
- Filler
- Stowage , etc.. which I have as left overs from previous boxes
- Miniatures which I still have left from battlefront and I am not using
- Colours and Basecoat

Step 1: get yourself a base. I figured out the scaling for this project with the largest tank in my collection which is a Tiger I E. In this case he would fit perfect to my base or partly on it


Step 2: After this I used the filler to cover the matt and to give it a more terrain like look. On saving glue I used parts of the stowage to place alongside with it.


Step 3: Decide on which additional miniatures you want to add this scene. For this scene it is easy to add a couple of people helping out with the new stowage in place... Use PVA and sand for the basing, a bit of flock for the grass and dont forget your minis..


 Step 4: After this base is finished I added some extra colors around it to mark it as not an entrenched unit but one which is in repair. That makes it easier for you on the gaming table to recall what happened.


Now it is time for a cigarette .....

Happy building

Flames of War - This months tutorials are - Objectives

So guys .. what is your objectives was an article I read couple of times on WWPD. And yes the author is right about the fact that Flames of War lacks really much objectives. You will find plenty of terrain out there, but objectives is always a topic that does not get that much attention.

Instead of doing this that and so on during a month or on this blog I want to focus more on themes at least for the rest of the year and so this october will be a good start for Objectives and Markers to me. After building the first objective with the ruined house lately I guess this will be a good start.

You probably have seen quite some many high costs "Bail out" markers and so on.. but why not do them yourself ???

Lets see what this month will bring along.

Cheers and happy building


Freitag, 5. Oktober 2012

Flames of War - Rangers Programm - Starts on 11th of October 2012 at Cork UCC

Hi all,

as part of the "Battlefront Rangers" Programm I am happy to announce that this will start on 11th of october 2012 at UCC College / Cork City / Co.Cork / Ireland.


Gaming starts at approx 7pm and goes on til 10pm.

This should give you the directions from Patrick Street to the security hut on College road next to the gaming room. If you get the Number 5 right outside the O2 shop on Patrick St then you can ask to be dropped at the College Road Entrance and then its a short walk to L1 and L2.


Anyone who is interested in learning and playing Flames of War is very welcome to join in. Sessions include  a brief overview of the game and a couple of small skirmishes including :

Infantry Aces
Tank Aces

Rules provided are:

Flames of War Version 3
Infantry Aces
Tank Aces
North Afrika (mid War)
Devils Charge 
Grey Wolf
Bloody Omaha
D-Day -1
Montys Meatgrinder
etc...


Would be delighted to see some of you there. 

Cheers !

Montag, 1. Oktober 2012

Flames of War (Tutorial) : Building Objectives Part I - Ruined House Corner - The real last part ! Promised !

After all I decided to go ahead and at least insert some more life into the ruin.

Couple of matchsticks and the special offer of the local Arts&Hobby store (3 Acrylic paints 60ml for 10 EURO) should be enough.


Happy building everyone.... this piece is finally finished !