Hi all,
some posts earlier I told about the presentation I had with the manager of the store called "Other Realms" in Cork City.
Yesterday evening I got informed that they now Stock a limited supply of Battlefront Miniatures including the Starter Box (YEAH) and a couple of German and Allied tanks.
Support your local business !
In case someone is interested:
I will be displaying my display board in the upcoming weeks there including my homemade terrain as well as parts of my armies there. Currently we are looking how the display should look like.
I will also be holding a couple of demo games along during the next week. So drop in and have fun !
All around Wargaming with Flames of War. Also Terrain Building, Painting and WIP/Tutorials
Donnerstag, 29. August 2013
Montag, 19. August 2013
Weekend Painting - Flames of War
As my stepson has had some visitors over the weekend I needed the
calmness of painting. Take some good music and go ahead with something
in your mind.
The finished pieces are quite remarkable....
5 Panzer III / Flames of War / Plastic Soldier Company / 15mm
2 SU-122 / Flames of War / Battlefront Miniatures / 15mm
No decals by now as I still would need to order them. Simply I did run out on decals last month
The finished pieces are quite remarkable....
5 Panzer III / Flames of War / Plastic Soldier Company / 15mm
2 SU-122 / Flames of War / Battlefront Miniatures / 15mm
No decals by now as I still would need to order them. Simply I did run out on decals last month
Freitag, 16. August 2013
Flames of War - Tutorial - How to build a barn
After reading through OntheStep.net I thought it is time to build a bit more terrain. Also the WWPD.net guys inspired me heavily on building some new stuff.
As to figure out measurements etc... I will give you some hints here on what I used on mine.
Things used:
Foamboard
thin cardboard
Coffee sticks
Small metal pin (old needle cut down)
Beer matt
PVA Glue
Filler
Sand
Measurements:
Front side heigth 35mm, wide 75mm
Back side heigth 40mm , wide 75mm
Both sides approx size of a medium FoW base with heigth going from 35 up to 40mm
Step 1: Cut your pieces out of the foamboard
Step 2: Cut the two doors out of the beer matt and glue them to the smaller front side and scratch in the panels, also glue smaller crap pieces as handle and for the bars
Step 3: Use filler on each wall section so that you will have approx 3mm thick walls (that also matches the beer matt part then and the total thickness includes the foamboard)
Step 4: Stick the metal pin as a bar above the larger door.
Step 5: Put sand on each of your filler filled wall parts and gently press it into the filler. This gives texture for painting and an old worn feeling to the building.
Step 6: Let the parts dry
Step 7: Meanwhile cut your card board a bit larger then the overall building will be. Start glueing your coffee sticks on it (I did cut them before and broke them off, you could also wait and cut them afterwards)
Step 8: After everything is dry basecoat your wall sections as well as the roof part. If you are sure that you sealed your foamboard with the filler you can use a normal spray primer on that. If you are unsure just be on the safe side and prime it with a colour and a brush.
Step 9: After the primer dried the sand should stick in place as you first pressed it into the hardening filler and then sealed it in with the primer. Yeah !
Step 10: Paint as desired.
Step 11: Highlight as desired
Step 12: After drying .. enjoy the result
Montag, 12. August 2013
New Terrain additions
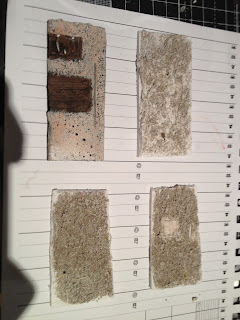
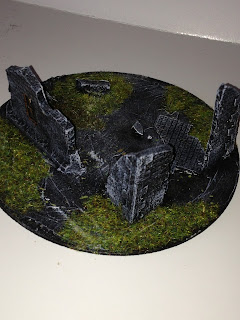
After Operation Overlord and all the gaming around I needed some more terrain. As you all know I am quite fond of making it myself and that resulted in me doing some molds and working with them....
So here we go (Picture heavy):
So here we go (Picture heavy):
Dienstag, 6. August 2013
Operation Overlord - Axis Victory
From the files of WWPD:
World history has been changed forever at the end of WWPD's Operation Overlord! The Axis have secured a victory in Normandy and all of France. The Allies thwarted at the final hurdle, Cherbourg and St-Lo proved just too much for the Allied forces. Now, low on supplies and heavily crippled, the Allied forces are being driven back to the sea in scenes seen only years before at Dunkirk.
The Allies had made good ground throughout the countryside, controlling a large potion of Normandy, including the towns of St-Lo and Cherbourg. Unfortunately, these vital supply routes were denied to the Allies. Each area was heavily fortified by experienced German troops used to fighting in urban environments at Stalingrad - they proved too much for the already battered and bloodied Allies.
Abonnieren
Kommentare (Atom)


